Team:
Product Designer
Timeline:
2020
Tools/Processes:
Product Design, Web Design
Inspiration and Sketches
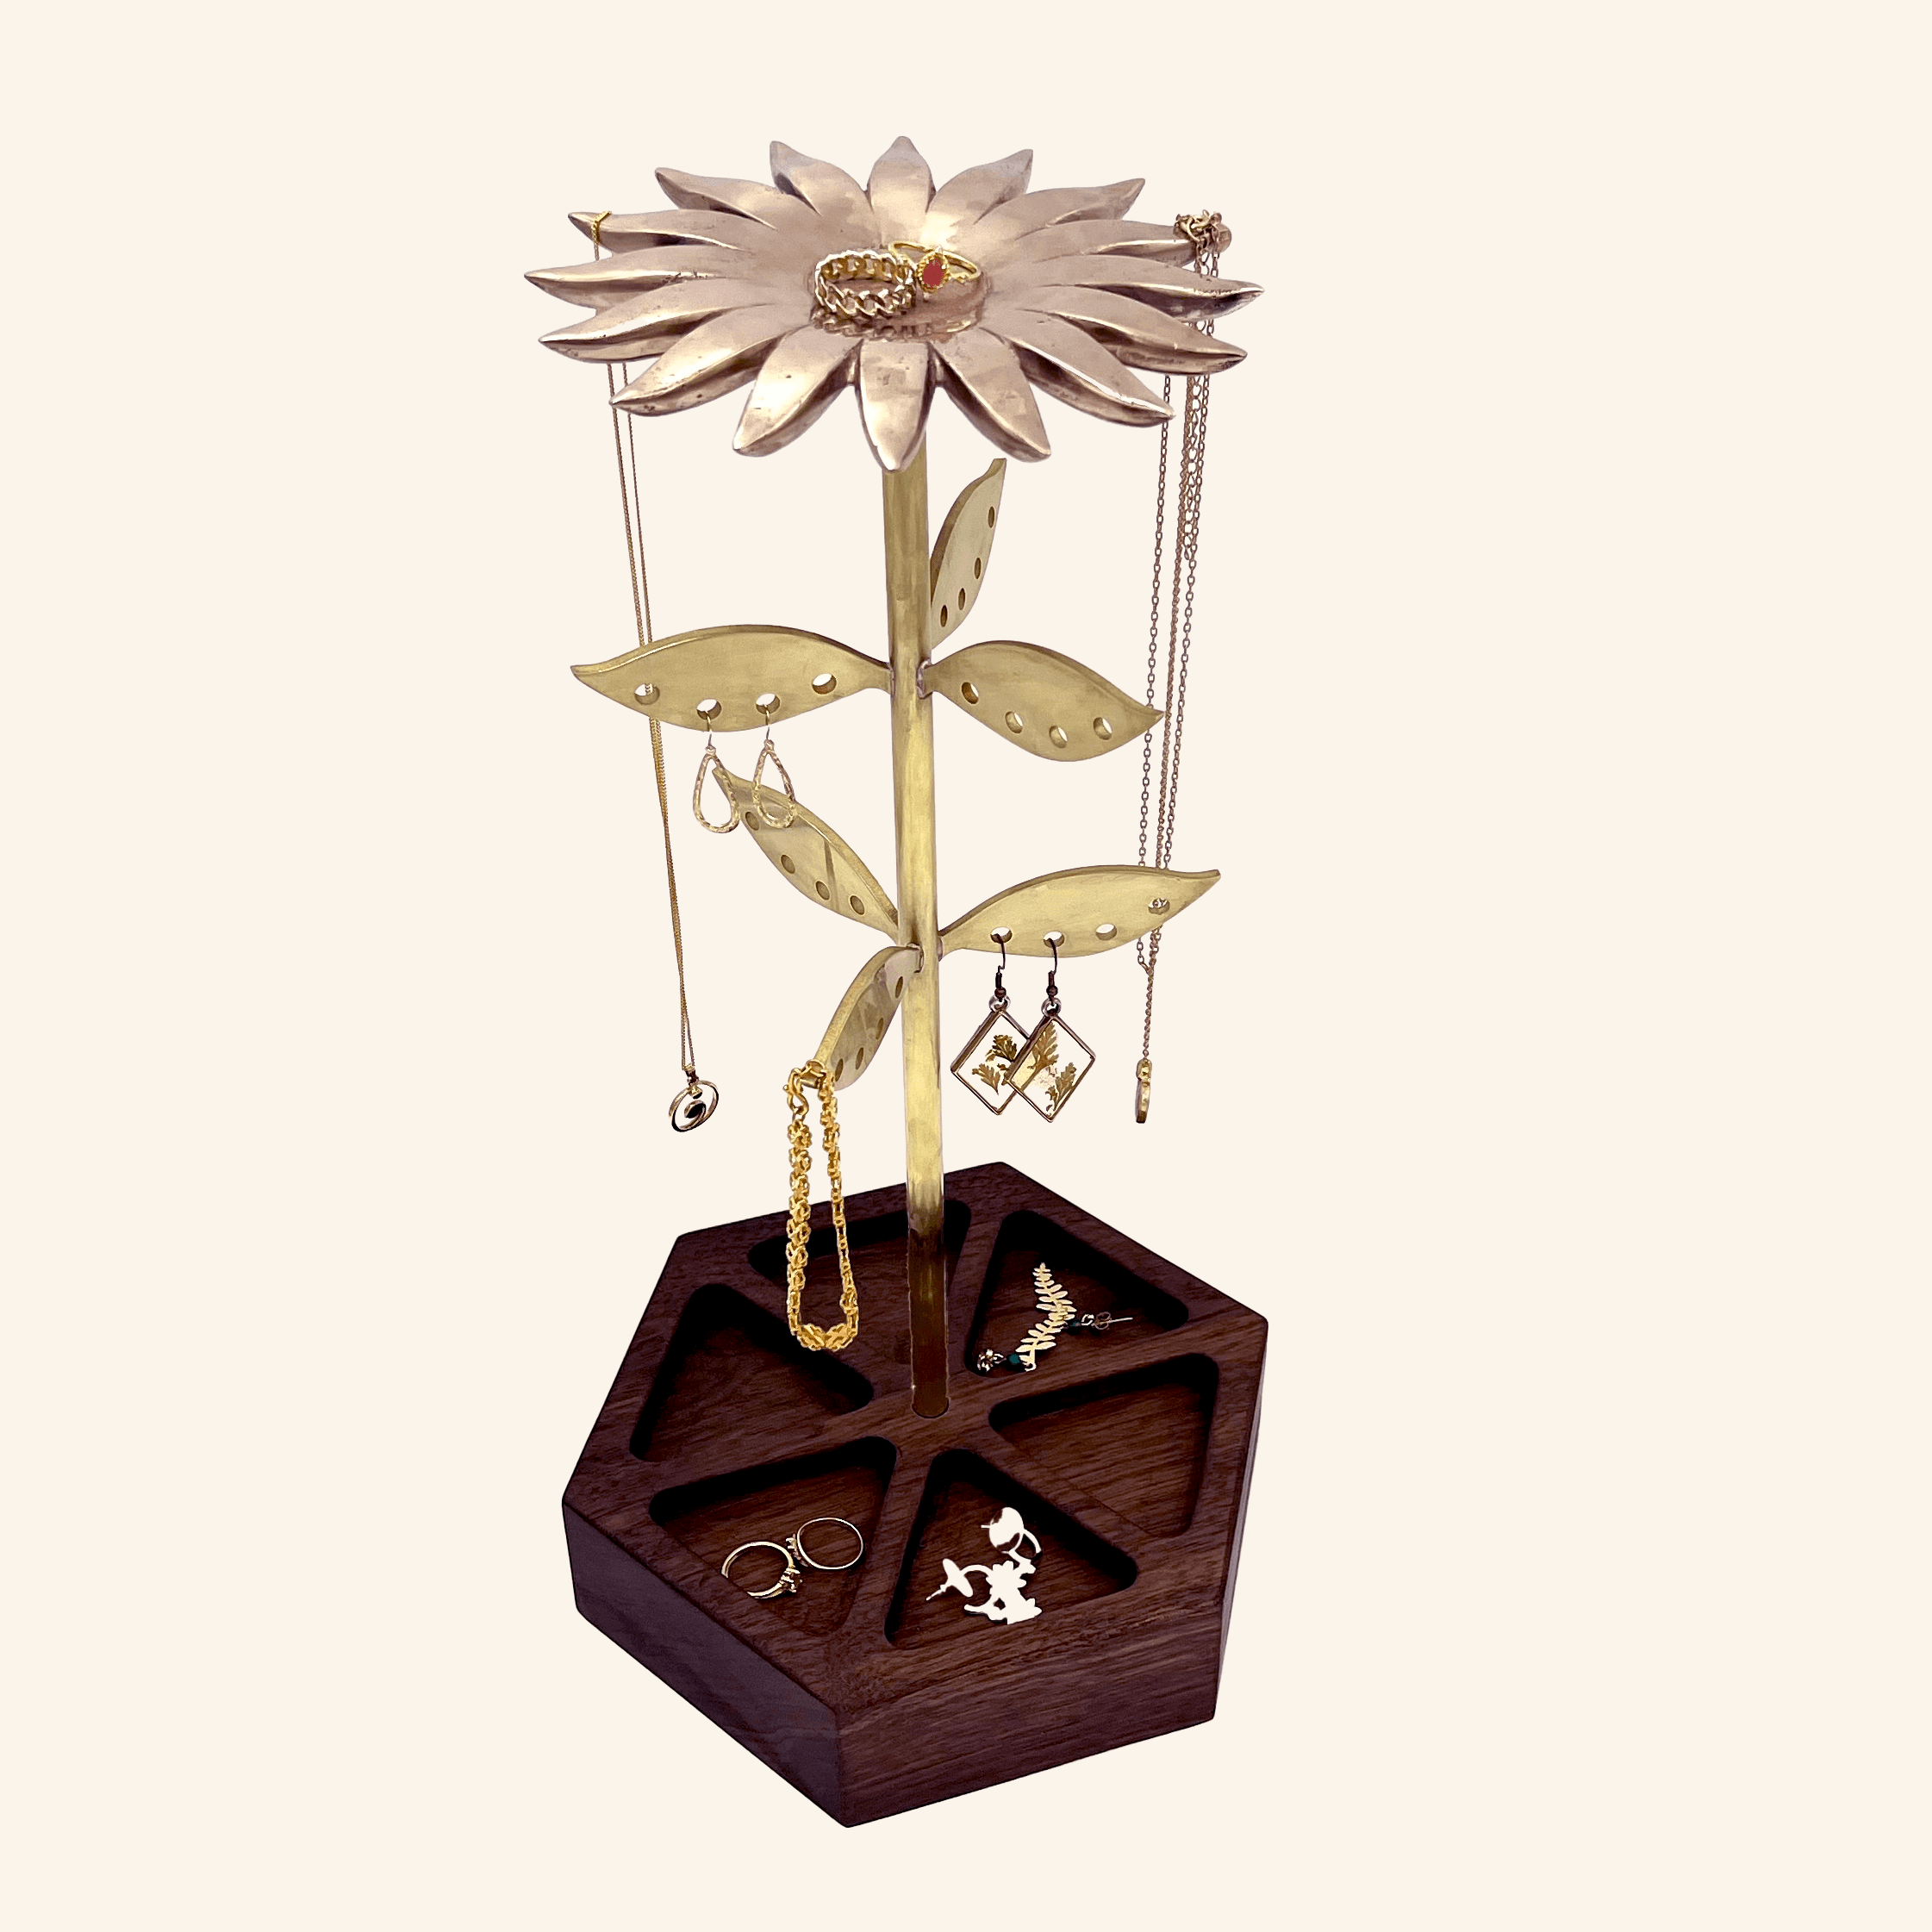
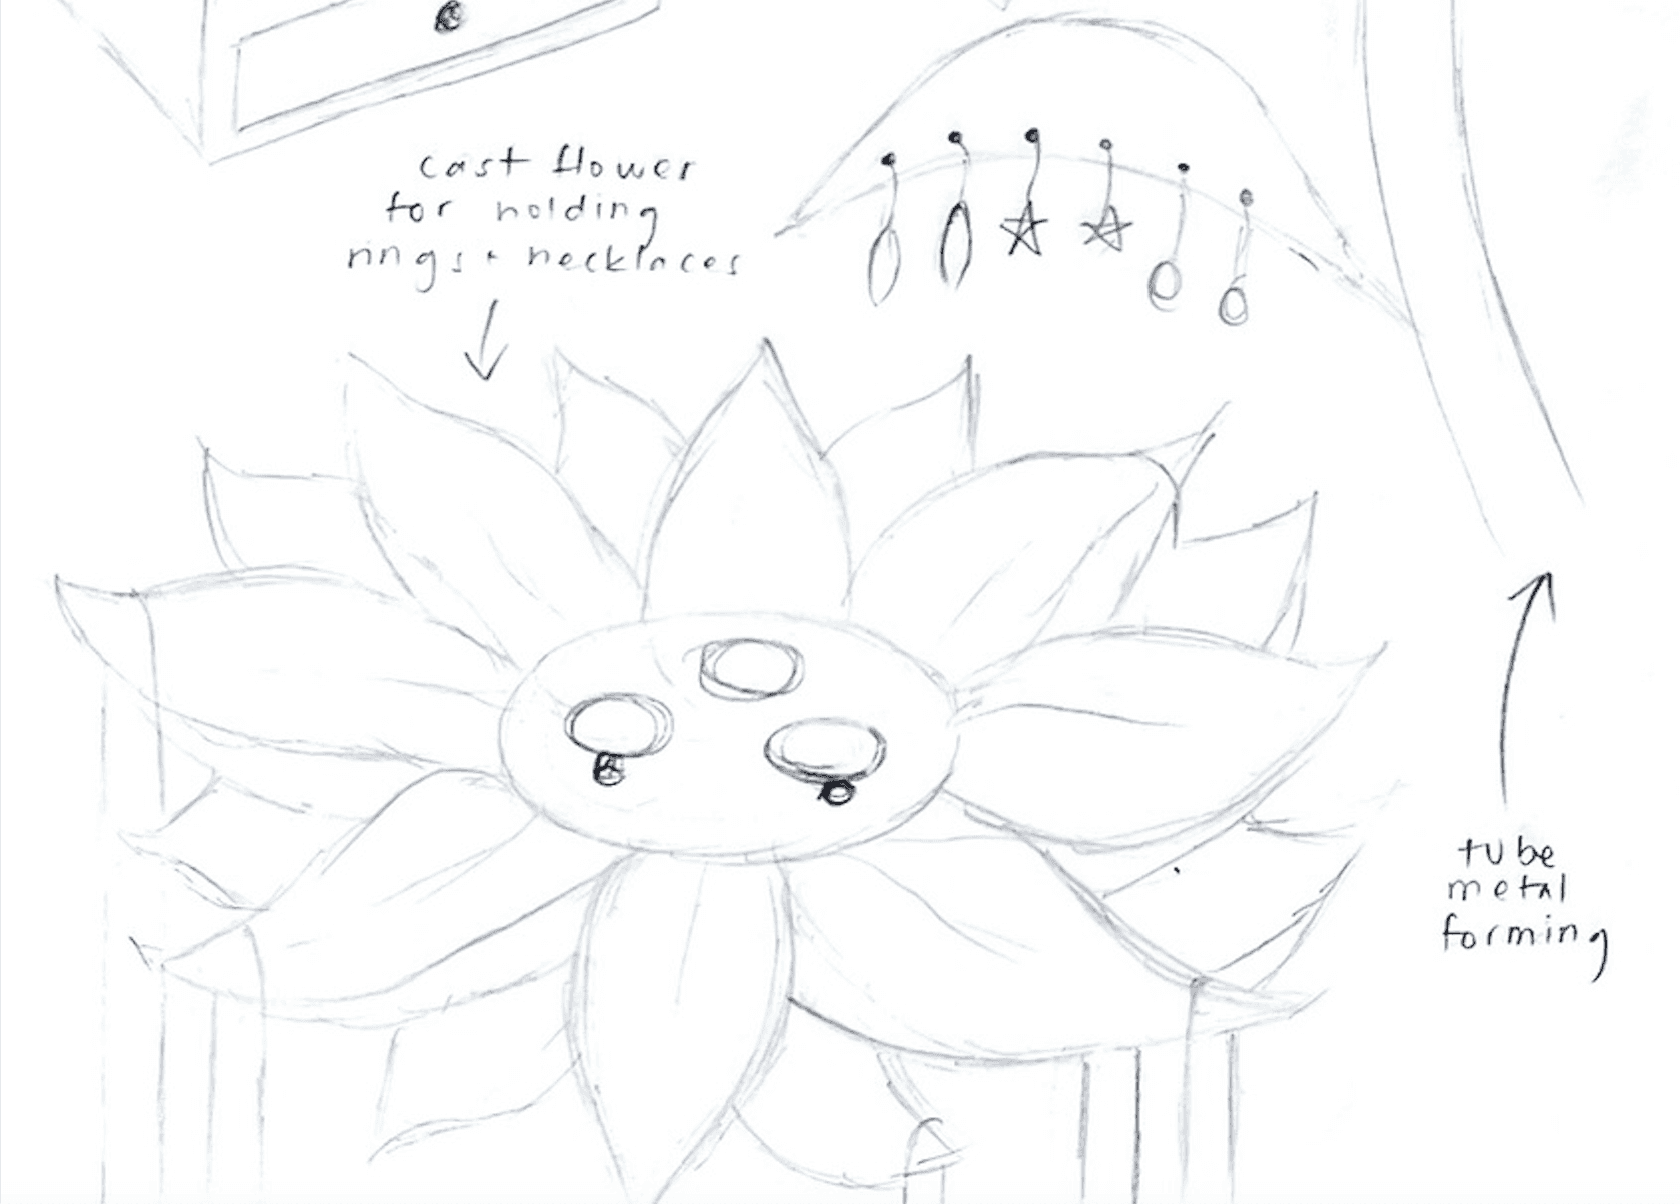
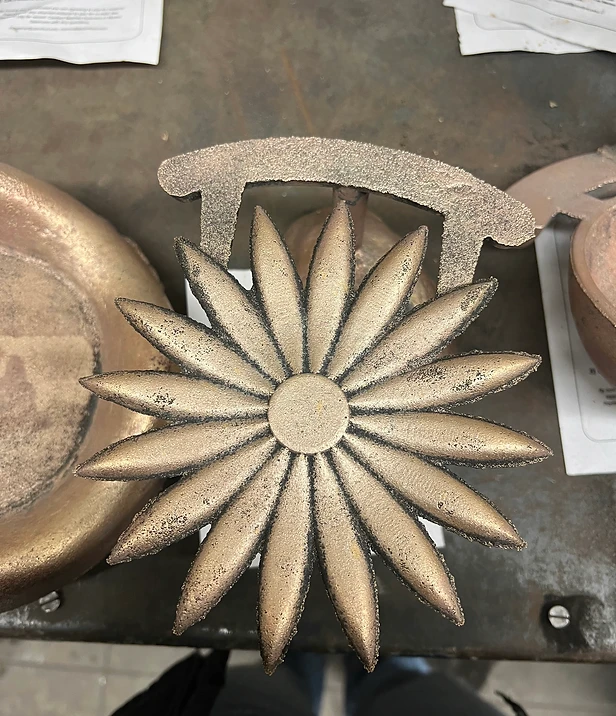
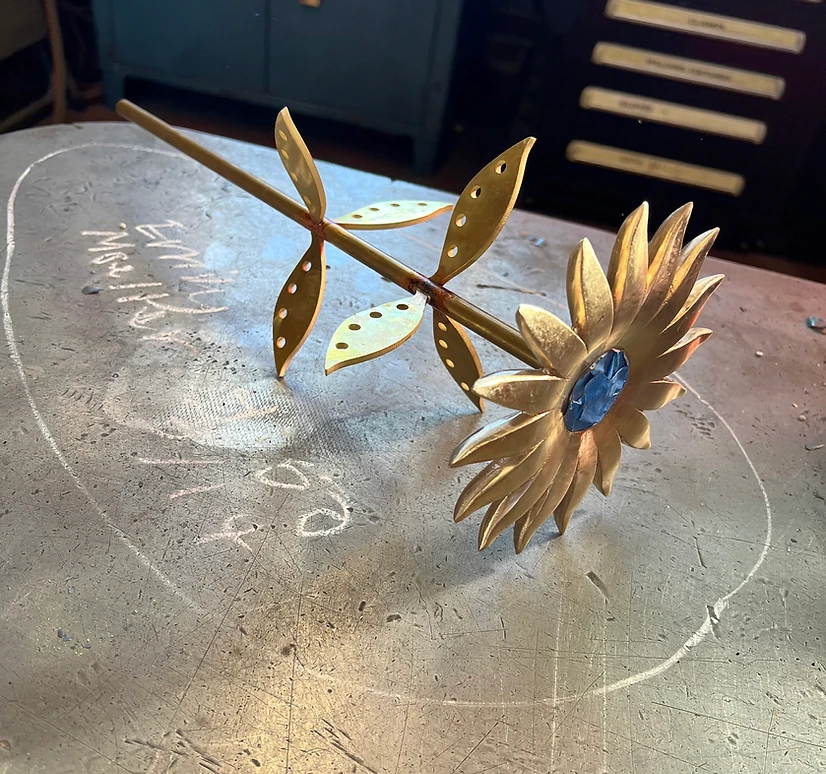
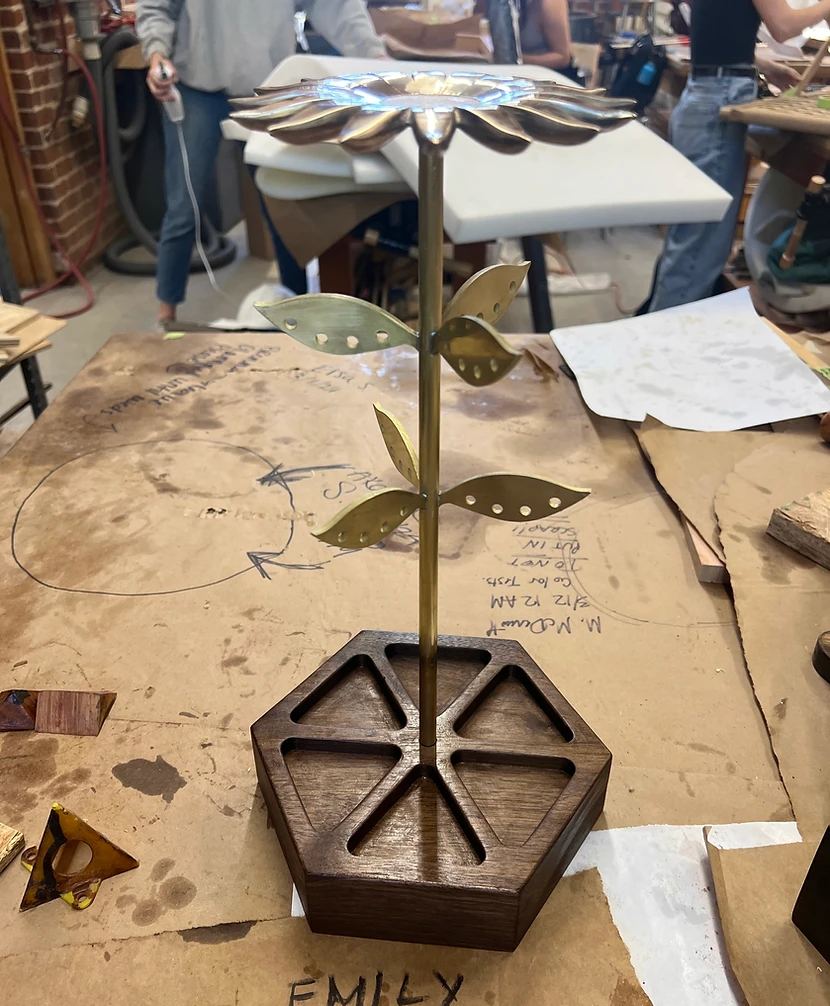
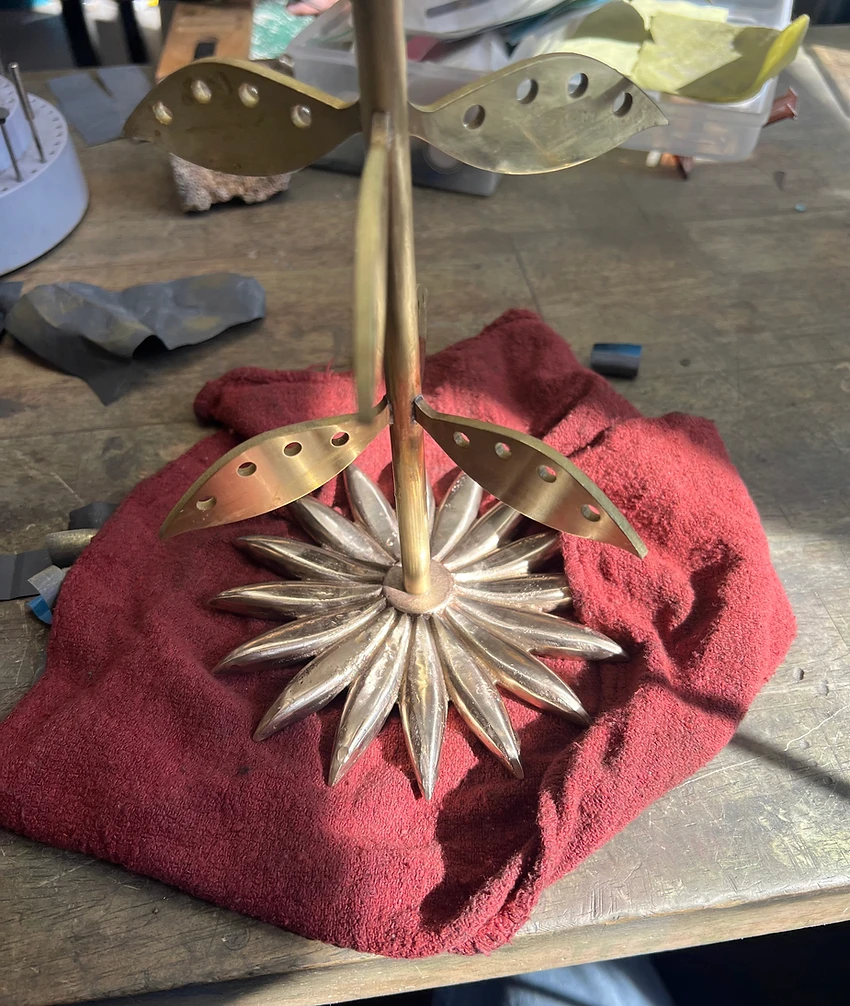
I was inspired by sunflowers, my favorite flower. I wanted to make a jewelry stand because I love collecting jewelry and I wanted to make something that I would use every day. I wanted to do something different, so I decided to make it in the shape of a flower. The flower petals are for necklaces, while the leaves are for earrings and bracelets, the disc is for rings, and the base is for any other miscellaneous items. I put a lot of thought into the design because I wanted to make sure that it would be suited for my jewelry collection.

Prototypes
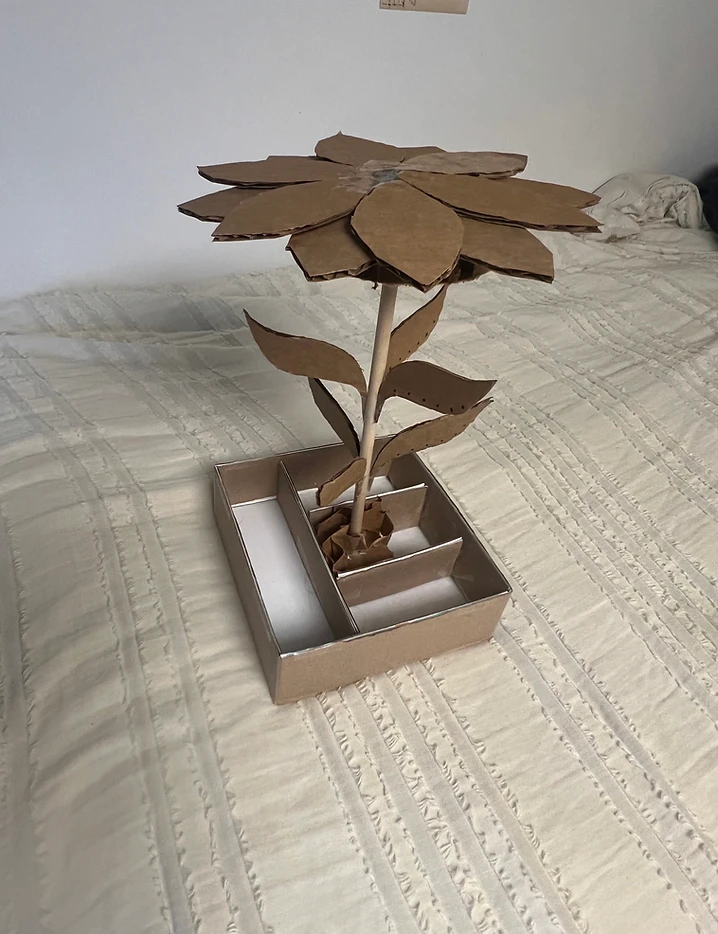
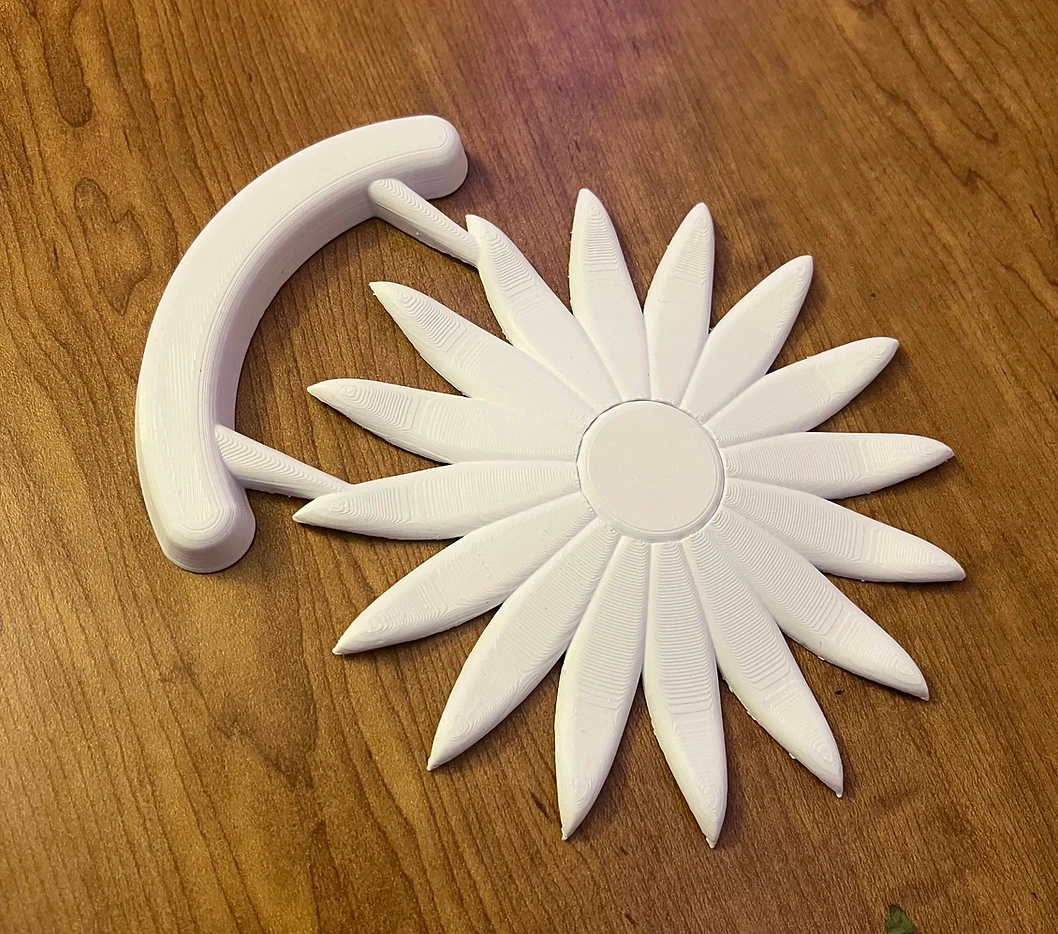
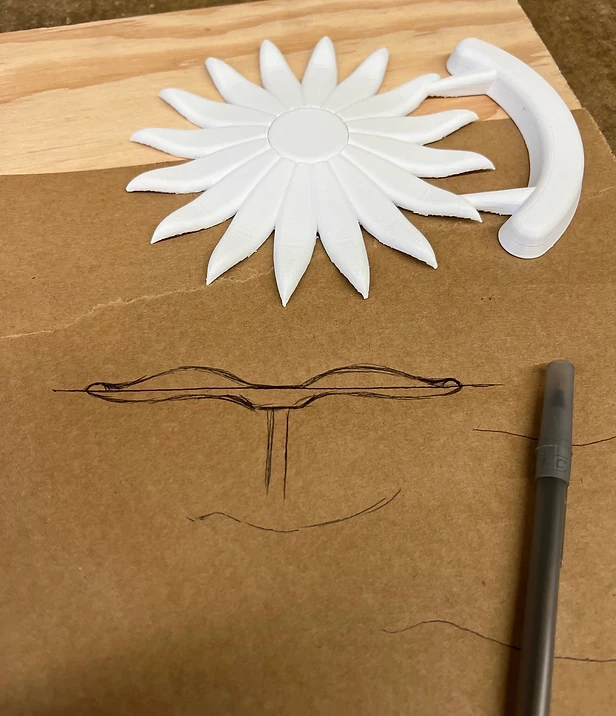
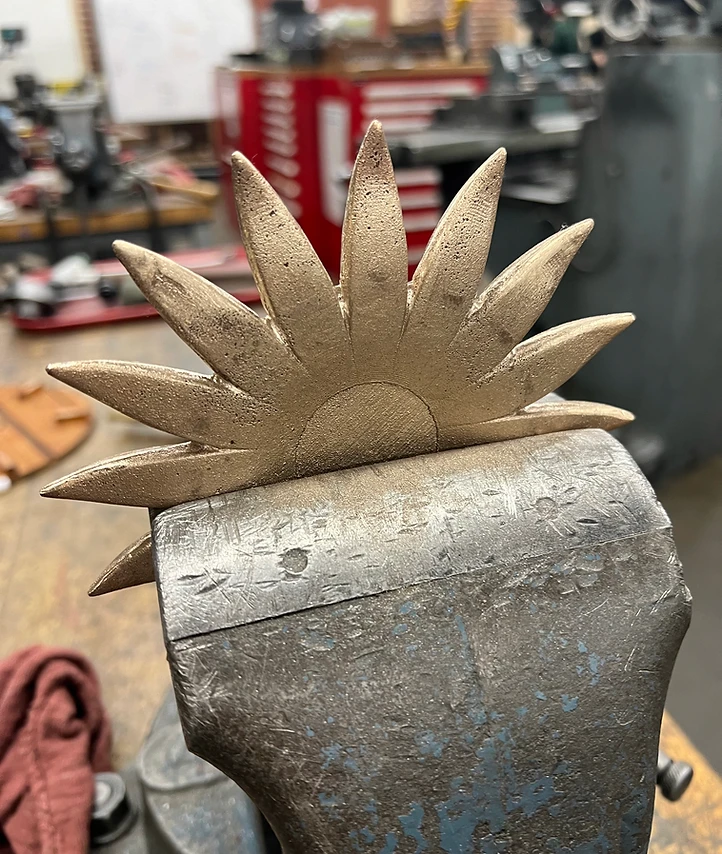
I created an initial rapid prototype out of cardboard, which was a great exercise for figuring out proportions and sizes. I wanted to make sure that the jewelry would have enough space to hang and not overlap. I wanted to make sure the necklaces didn't touch the base and that the earrings would have big enough holes on the leaves. Through this prototype, I figured out the dimensions for my project. I also created several 3D printed prototypes for my pattern. Additionally, I used prototypes throughout the fabrication process. A big example of this was when I used a prototype for creating the flats on the stem rod to make sure my method worked, then used that same prototype to practice brazing so that I knew what to do.
Fabrication Part 1 - Pattern Making and Sand Casting
I spent a lot of time working on and refining my pattern. I initially made a loose pattern, but when I 3D printed it out, I realized that I didn’t like how one of the sides looked, even though it looked good in my CAD model. So I decided to make a fixed pattern instead, and it took some thought to make sure it was drafted properly. I printed out both sides of this new pattern, but one of them turned out to be too thin, so I redesigned and printed yet another one, which I was happy with. When I went to ram it up, it actually worked out perfectly. My pattern pulled easily, with the help of a little graphite on the finer details.

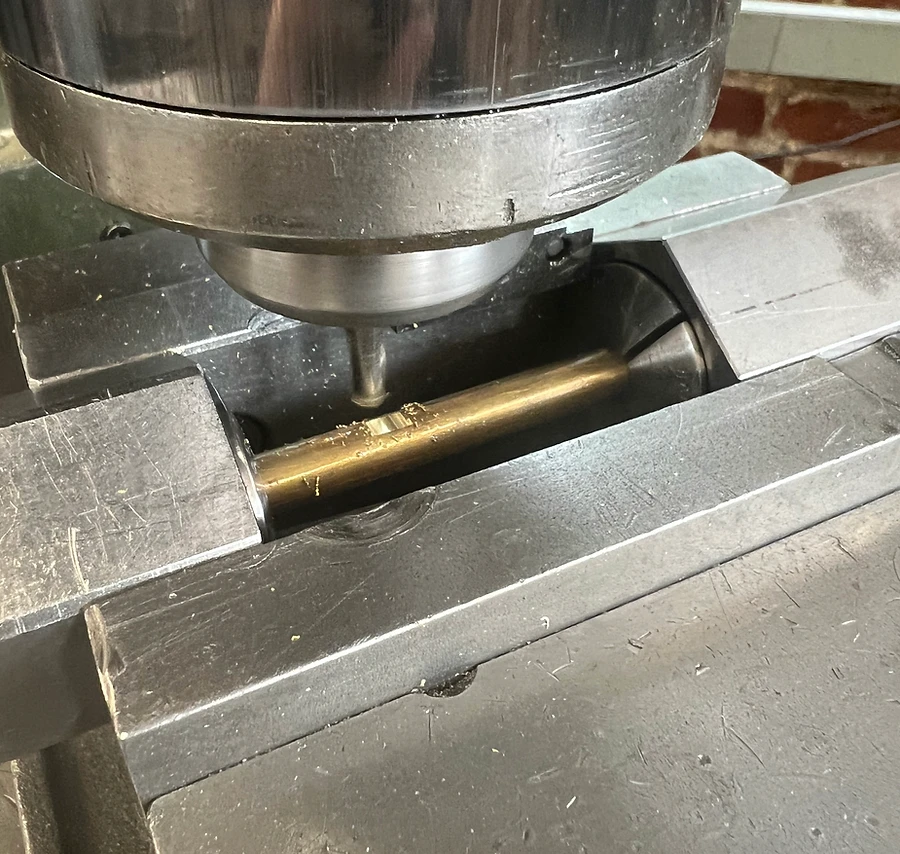
Fabrication Part 2 - Milling
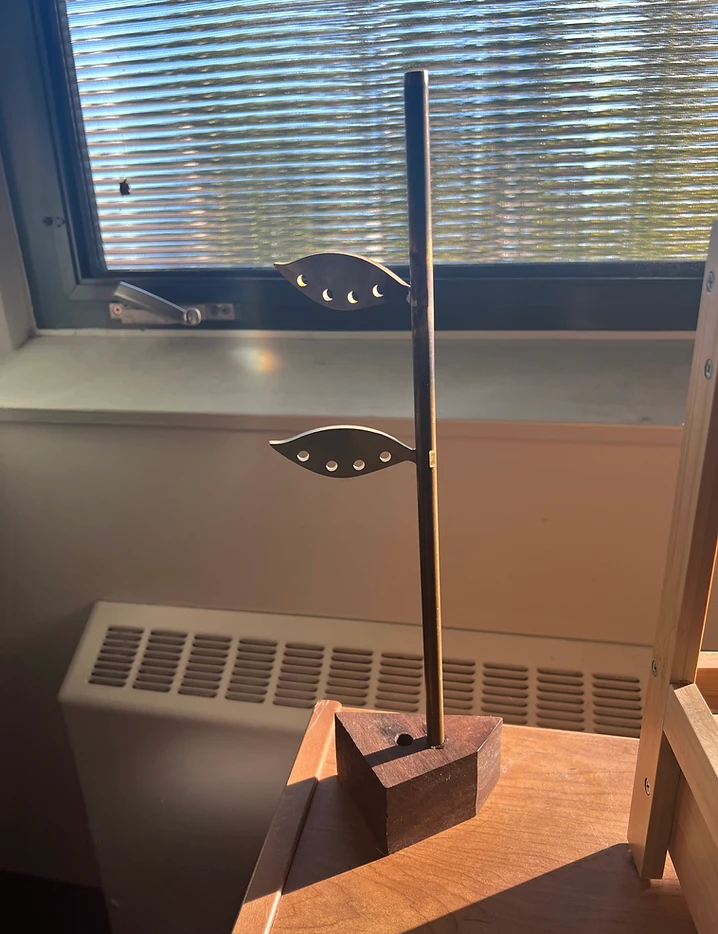
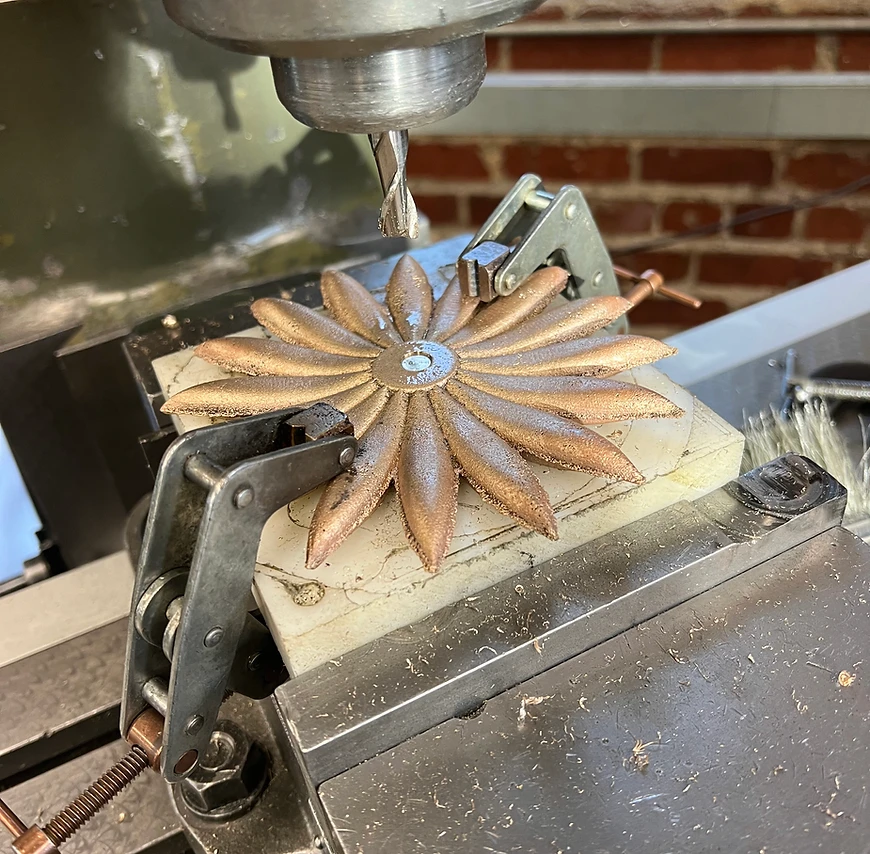
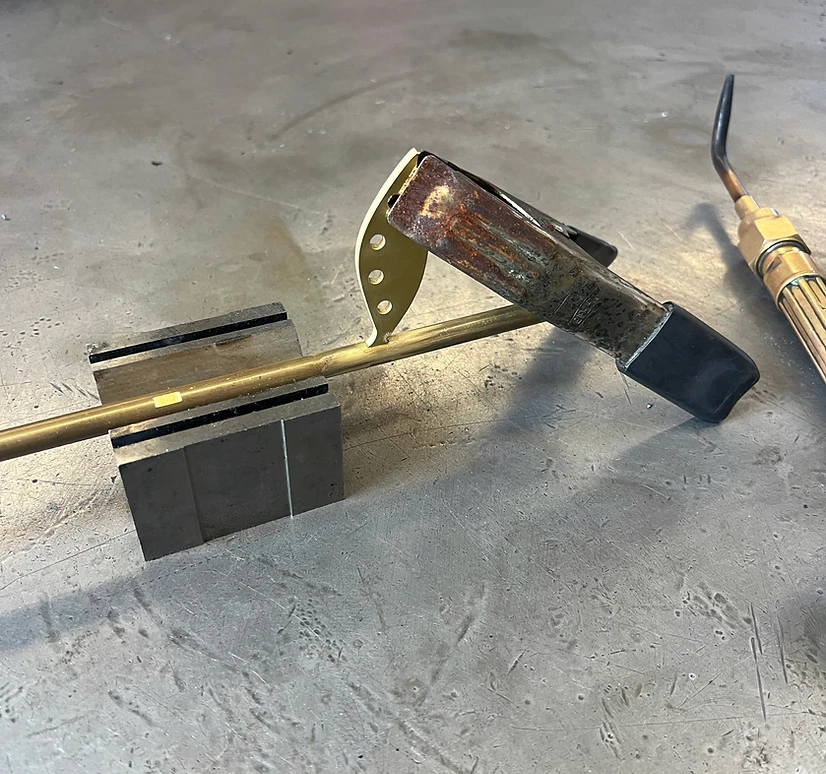
I used a manual mill to create six flats on my brass tube so that I could braze on the leaves. The original plan was to use an indexing head to even space out the flats, but I found an easier solution. I ended up using a hexagon collet to divide the tube into six sides. All I had to do was make sure the tube was clamped properly then turn it over one side for every flat. I also used the mill to create flats on the top and bottom of the tube and to create a hole (for extra surface area) in the middle of the flower where the tube will be brazed on.
Fabrication Part 3 - Waterjet Cutting and Brazing
After waterjet cutting a bunch of leaves, with lots of extras, I started on brazing. I was really worried about brazing, because it would be difficult to clamp everything and I was scared of blowing through the metal. I started with extra practice material, which ended up being a really good decision. I had to get creative with clamping especially as I brazed on more and more leaves. I also had to be precise with timing. I found that if I heated the metal for too long, the other leaves would fall off because the silver would melt. So I had to braze a lot of the leaves multiple times, but it eventually worked out. I also attached the flower to the top of the tube by brazing.

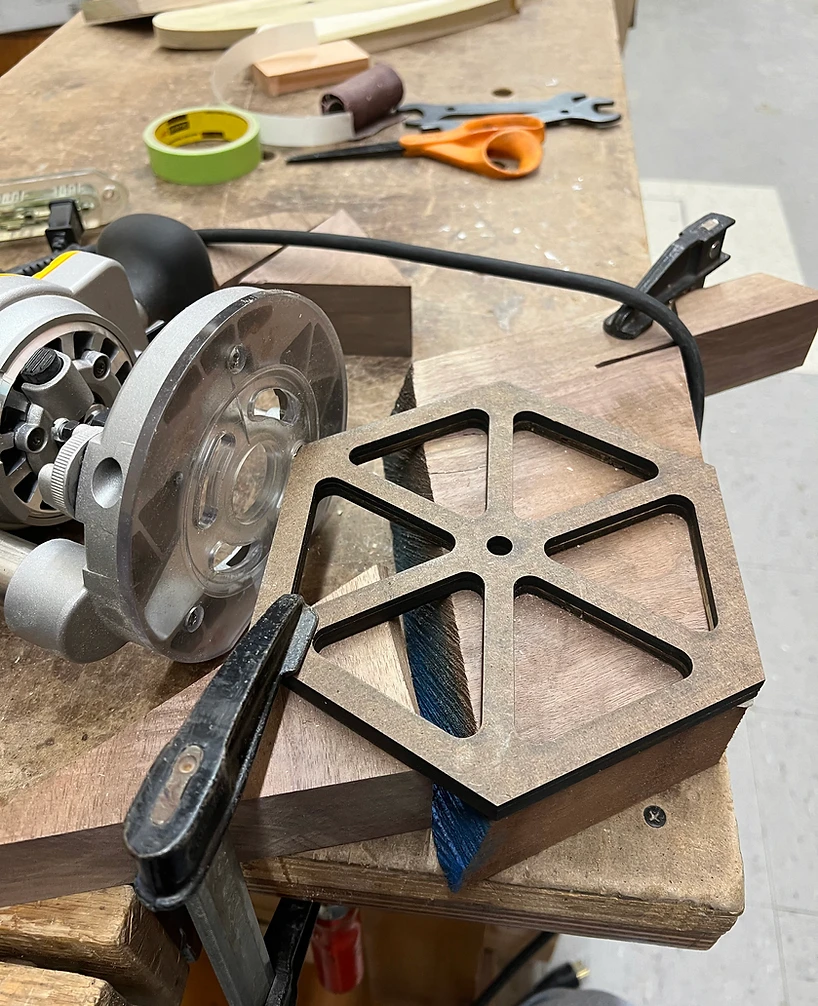
Fabrication Part 4 - Woodworking and Finishing
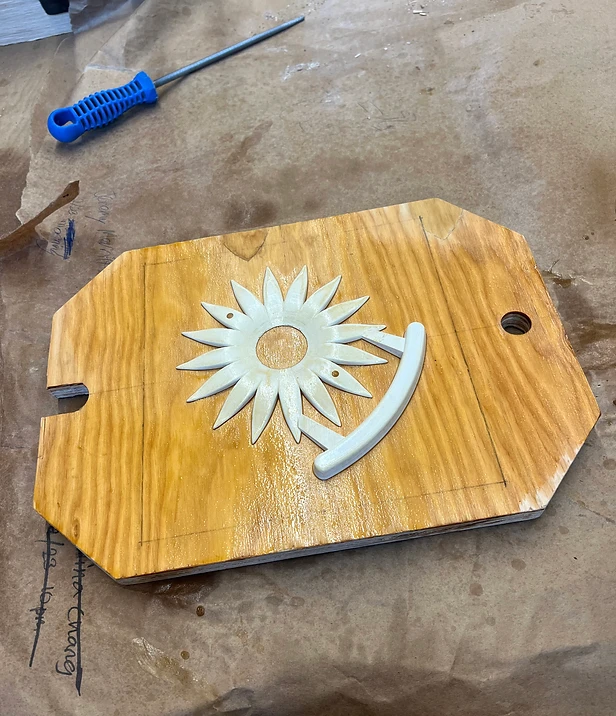
Making the wooden base also took longer than I thought. I initially imagined a simple rectangle with grooves, but I decided that a hexagon would look better since it would fit with the shape of the flower. I created the grooves by creating a guide using a hand router. Then I sanded everything. I attached the flower to the base by drilling a hole and gluing it with epoxy. Finishing also took a long time and patience. Every component was easy except for the flower. The flower had tight spots that I could only file or sand with a really small tool, and I had to get creative at times. I wanted a shiny finish so sanded 1500 grit. It was worth it in the end, because I loved the look of the finished product.
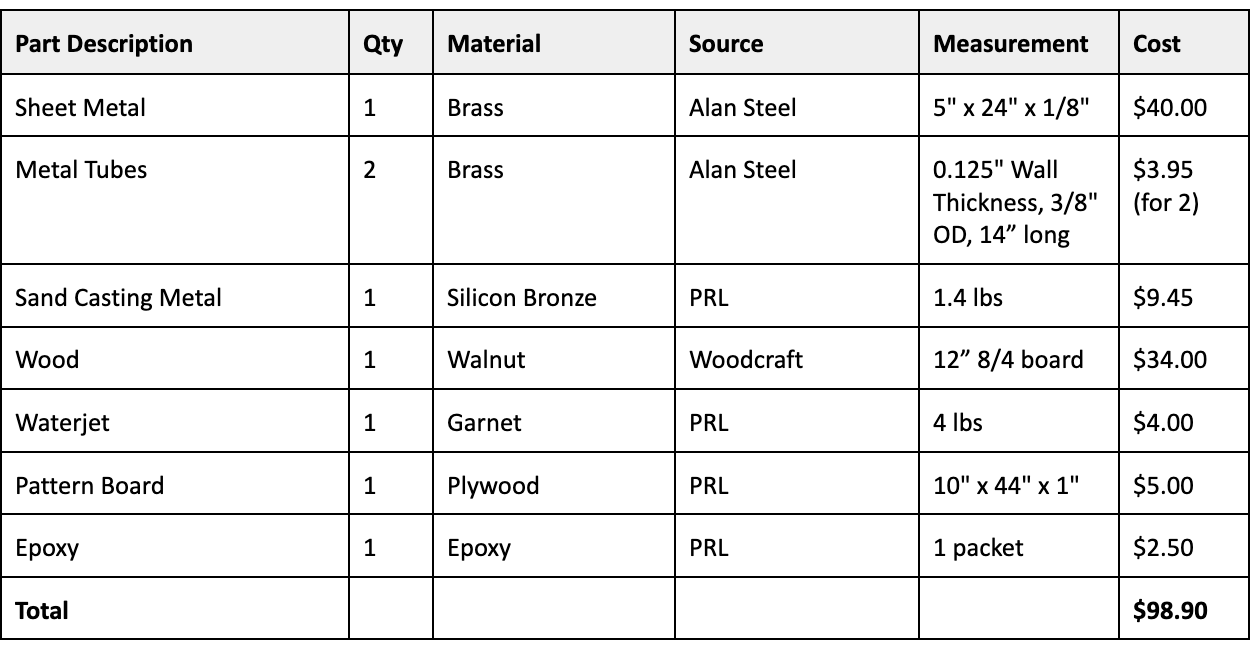
Bill of Materials
Final Product and Presentation
At the end of the quarter, I presented my project at Meet the Makers, a quarterly showcase for student makers.